-
스프링부트 Welcome Page 만들기(스프링부트 hello 출력하는 페이지 만들기)Spring Framework 2021. 12. 31. 18:01반응형
이전시간에 스프링부트 스타터를 통하여 프로젝트를 만들고 이를 실행하여 localhost:8080에 접속하였을 때 Whitelabel error page 에러 메시지가 출력되었습니다.
오늘은 에러 메시지 대신에 hello가 출력되도록 만들어 보겠습니다.
또한 thymeleaf 템플릿 엔진을 사용하여 동적인 페이지를 만들어 보겠습니다.
Welcome Page란?
도메인만 누르고 들어왔을 때 첫 화면을 의미합니다.
예를 들면 네이버나 구글에 접속하였을 때 첫 화면을 의미합니다.
여기서는 localhost:8080으로 접속하였을 때 첫 화면을 의미합니다.
즉, 스프링부트를 통해 hello가 출력되는 페이지를 만들어보겠습니다.
src/main/recources/static 폴더에 index.html 파일 만들고 코드 입력
index.html파일이 Welcome Page가 됩니다.
<!DOCTYPE html>
<html>
<head>
	<title>Hello</title>
	<meta http-equiv = "Content-Type" content="text/html; charset=UTF-8"/>
</head>
<body>
Hello
<a href = "/hello">hello</a>
</body>
</html>
index.html 파일을 생성하고 위의 코드와 같이 작성한 뒤 HelloSpringApplication.java를 실행합니다.
localhost:8080에 접속하면 아래와 같이
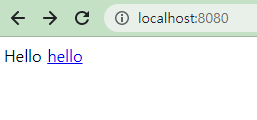
localhost:8080 Hello와 /hello로 이동하는 하이퍼링크가 걸려있는 hello가 출력되게 됩니다!
여기서 만약 하이퍼링크가 걸려있는 hello를 클릭하게 되면 /hello에 대한 정보는 없기 때문에 Whitelabel error page 에러 메시지가 출력될겁니다.
스프링 부트 레퍼런스 문서에서 Ctrl + F를 통해 index.html/Welcome Page을/를 검색해보시면 아래와 같은 글이 보입니다.
Spring Boot supports both static and templated welcome pages. It first looks for an index.html file in the configured static content locations. If one is not found, it then looks for an index template. If either is found, it is automatically used as the welcome page of the application.
해석해보면 스프링부트는 static과 templated를 통해 welcome page를 지원하며, static 폴더에서 제일먼저 index.html 파일을 찾고, 찾지 못한다면 template에서 index 탐색하여 자동적으로 application의 welcome page로 사용한다고 합니다.
스프링에는 방대한 기능이 있기 때문에 이처럼 검색을 할 수 있는 능력을 키우시는것도 중요합니다.
위는 정적 페이지로 항상 같은 페이지를 출력하지만 Thymeleaf 템플릿 엔진을 사용한다면 사용자의 따라 다양한 페이지를 출력하는 정적 페이지도 작성할 수 있습니다.
스프링 부트 레퍼런스 문서에는 템플릿 엔진을 다음과 같이 정의했습니다.
As well as REST web services, you can also use Spring WebFlux to serve dynamic HTML content. Spring WebFlux supports a variety of templating technologies, including Thymeleaf, FreeMarker, and Mustache.
Spring Boot includes auto-configuration support for the following templating engines:
해석해보면 REST 웹서비스 등과같은 동적인 HTML content를 제공하기 위해 Spring WebFlux는 Thymeleaf, FreeMaker, Mustache와 같은 템플릿팅 기술을 지원하며, 위와 같은 템플릿 엔진을 사용할 때 자동적으로 환경설정을 해준다고 합니다.
저희는 스프링부트 스타터에서 Dependencies를 설정할 때 Thymeleaf라는 템플릿 엔진을 선택했었습니다.Thymeleaf와 다양한 템플릿엔진에 대해서는 추후에 조금 더 자세하게 다루어 보겠습니다.이제 동적인 페이지를 Thymeleaf를 사용하여 만들어 보겠습니다
1.src/main/java 경로에 controller 패키지 만들고 HelloController.java 파일 만들기
package hello.hellospring.controller;

import org.springframework.stereotype.Controller;
import org.springframework.ui.Model;
import org.springframework.web.bind.annotation.GetMapping;

@Controller
public class HelloController {
	@GetMapping("hello")
	public String hello(Model model) {
		model.addAttribute("data", "hello!");

		return "hello";
	}
}
@Controller는 어노테이션입니다. 이 문구를 통해 해당 클래스가 Controller로 사용됨을 Spring Framework에 알립니다.
@GetMapping("hello") 또한 어노테이션으로 웹어플리케이션에서 /hello가 호출되면 아래의 메서드를 호출합니다.
model은 Model-View-Controler(MVC)에서 model을 의미합니다.
model.addAttribute 부분의 "data"는 변수의 이름, "hello!"는 변수의 값으로 이해하시면 됩니다.
이 때 hello!를 다른 값으로 변경한다면 hello! 대신에 다른 값이 출력됩니다.
2. src/main/resources/templates 경로에 hello.html 파일 만들기
<!DOCTYPE html>
<html xmlns:th="http://www.thymeleaf.org">
<head>
	<title>Hello</title>
	<meta http-equiv="Content-Type" content="text/html; charset = UTF-8"/>
</head>
<body>
	<p th:text="'안녕하세요.' + ${data}" > 안녕하세요. 손님</p>
</body>
</html>
<html ....> 구문을 통하여 템플릿엔진으로서 thymeleaf 문법을 사용할 수 있습니다.
<p ...></p 구문에 있는 ${data} 부분에서는 1번 파일의 mode.addAttribute의 "data" 변수의 이름과 이 부분에 hello! 라는 변수의 값이 들어가게 됩니다.
3. 다시 서버 실행하기
서버를 다시 실행하고 localhost:8080으로 접속하게 되면 이전에 만들어둔 index.html 페이지로 이동하게 되고 index.html에 만들어둔 a태그 /hello 하이퍼링크가 걸려있는 hello를 누르게 되면 안녕하세요.hello!가 보여지게 됩니다.
만약에 에러가 발생하신다면 오타가없는지 잘 확인해보시길 바랍니다.전체적인 동작과정

웹 브라우저에서 localhost:8080/hello 라는 URI가 들어오면 스프링 부트가 내장하고 있는 내장 톰켓 서버에서
스프링 컨테이너의 helloController에게 전달해 줍니다.
/hello가 컨트롤러에게 전달되고 @GetMapping("hello") 어노테이션을 통해 메소드가 실행됩니다.
스프링이 만들어준 model에 addAttribute("data", "hello!")을 통해 값을 넣고 "hello"를 return하게 됩니다.
이 리턴값을 viewResolver에게 넘기고 viewReslover는 view를 찾아주고 템플릿엔진과 연결시켜주게 됩니다.
이 때 viewName 매핑을 진행하는데 resources/templates/ + {viewName} + .html을 통해 viewName이 hello이므로 resources/templates/hello.html 이 웹브라우저에게 전달됩니다.
출처https://www.inflearn.com/course/%EC%8A%A4%ED%94%84%EB%A7%81-%EC%9E%85%EB%AC%B8-%EC%8A%A4%ED%94%84%EB%A7%81%EB%B6%80%ED%8A%B8[무료] 스프링 입문 - 코드로 배우는 스프링 부트, 웹 MVC, DB 접근 기술 - 인프런 | 강의
스프링 입문자가 예제를 만들어가면서 스프링 웹 애플리케이션 개발 전반을 빠르게 학습할 수 있습니다., 스프링 학습 첫 길잡이! 개발 공부의 길을 잃지 않도록 도와드립니다. 📣 확인해주세
www.inflearn.com
https://docs.spring.io/spring-boot/docs/2.6.2/reference/htmlsingle/
Spring Boot Reference Documentation
This section goes into more detail about how you should use Spring Boot. It covers topics such as build systems, auto-configuration, and how to run your applications. We also cover some Spring Boot best practices. Although there is nothing particularly spe
docs.spring.io
'Spring Framework' 카테고리의 다른 글
템플릿엔진이란? (0) 2022.01.07 MVC 패턴이란? (스프링 MVC) (0) 2022.01.04 build.gradle 파일 분석 (0) 2021.12.29 이클립스로 스프링부트 프로젝트 시작하는 법(Spring Initializr) - Gradle 에러 디버깅 (0) 2021.12.26 Spring Framework 특징 (0) 2021.12.21